Building Microservices using Azure Service Fabric 2.0
April 13, 2016 · 6 minute read
Azure Service Fabric is now GA (general availability) meaning it’s out of preview and ready for production use. In this post we’ll take a look at the new version and see how to create and deploy our first Service Fabric service.
Check out the source code for the following example at https://gitlab.com/blog-posts/GitLabKanban/tree/master
What is Service Fabric?
Let’s say you want to adopt a microservices architecture for your application. You want to break your application down into a number of smaller services which you can scale and deploy independently of each other.
You also want to do this without directly managing the infrastructure (either physical boxes or virtual machines).
Service Fabric may be a good option.
Service Fabric is Microsoft’s latest microservices offering. With it you can build your application as any number of services. These services can then be deployed to a Service Fabric cluster running locally (on your dev machine), in Azure or on your own windows servers.
Kicking the tires on Service Fabric 2.0
So now it’s generally available Service Fabric is at version 2.0. You can download the SDK for Visual Studio 2015 or indeed the new preview of Visual Studio 15.
This will install the runtime, core SDK and tools for Visual Studio.
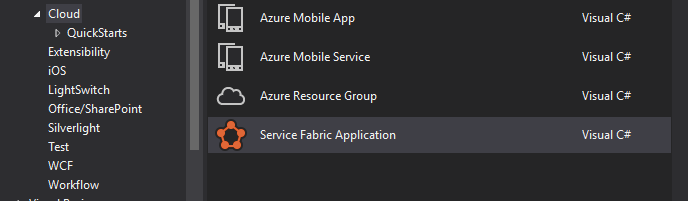
With that installed you’ll find a new project template for creating a Service Fabric application.
Next up you’ll be asked which type of service you want to create.
No ASP.NET Core Project Template (Yet)
In the preview you could create a new .net core web application as the front end for your services-based application.
In this version Microsoft has temporarily removed this template. This is with good reason. ASP.NET Core (formerly ASP.NET 5) is undergoing a significant architectural change away from DNX (the .NET Execution Environment) to the .NET CLI (Command Line Interface).
To avoid significant impact for people migrating to ASP.NET Core RC2 (which will be available shortly) they decided to keep the service template out for now.
In it’s place you will find a stateless web service template based on Project Katana which is effectively the result of following Get Started: Service Fabric Web API Services with OWIN Self-Hosting.
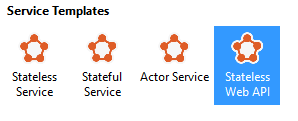
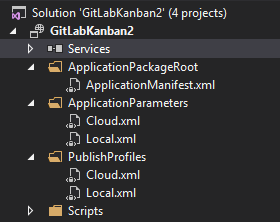
Select this option and you’ll end up with a Service Fabric Application consisting of one service (your API project).
This can act as the front-end API for your application.
Test Locally
Hit CTRL-F5 to run your application. If this is the first time you’ve done this you’ll have to wait a short time for your local cluster to be created.
When working on your application locally you can deploy it to your local cluster for testing and debugging. This cluster is not an emulator, it creates nodes using the exact same technology that your services will eventually operate on in the cloud.
Once the cluster’s up and running a browser will open and show you the result of calling the test controller (ValuesController).
Let’s create and interact with a service that actually does something.
The Actor Model
One of the service models you can adopt with Service Fabric is based on the Actor Model. Essentially actors are single-threaded services which represent an entity in your domain.
For example, given a Kanban board application you might have an Actor to represent any given board.
There will only ever be one instance of the actor for a specific board. If you wish to interact with the board, Service Fabric will locate that one instance for you and orchestrate your commands/queries for you.
Add a new service by right clicking on Services inside your Application.

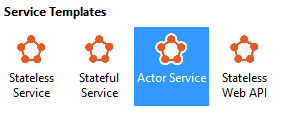
When you add a new service to a Service Fabric Application you can from several different service types. For this we’re going to create an Actor Service.
In this version of Service Fabric you will find that an Interfaces project is automatically created for you. This is the project that your clients will interact with (in order to retrieve the types of your services). They will never interact with the services directly as requests are routed via Service Fabric (to an appropriate instance of any given service).
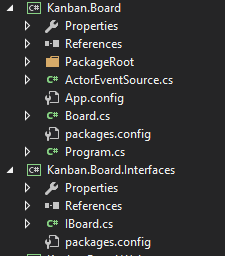
In this case we’ve got our two projects, one for the service itself (Kanban.Board) and one for the Interfaces (Kanban.Board.Interfaces).
Our first Kanban Board Service
To keep this simple, we’ll make it possible to create a new Kanban Board from the API and set it’s Display name.
We start by adding a couple of methods to our Actor Service.
namespace Kanban.Board
{
    [StatePersistence(StatePersistence.Persisted)]
    internal class Board : Actor, IBoard
    {
        Task IBoard.Initialise(string name)
        {
            return this.StateManager.SetStateAsync("Name", name);
        }

        Task<string> IBoard.Details()
        {
            return StateManager.GetStateAsync<string>("Name");
        }
    }
}
Simple right? The Initialise method takes a name for the board and stores it using the StateManager.
This is equivalent to setting a value in a dictionary using someDictionary["name"] = "Test". The state is saved automatically at the end of the method.
Hooray, no ORMs or mapping to worry about. When this method completes the data is automatically saved and replicated with high availability.
The Details method simply retrieve’s the board’s details (currently just name).
Hooking up the API
So what about our API? Well we’ll need to provide a means to both create a board and then retrieve it’s details. We can do this in an ApiController.
namespace KanbanBoard.Web.Controllers
{
    public class BoardController : ApiController
    {
        public async Task<string> Get(Guid id)
        {
            IBoard board = ActorProxy.Create<IBoard>(new ActorId(id));
            var result = await board.Details();
            return result;
        }

        public Guid Post(InitialiseBoard initialiseBoard)
        {
            var boardId = Guid.NewGuid();

            IBoard board = ActorProxy.Create<IBoard>(new ActorId(boardId));
            board.Initialise(initialiseBoard.Name);
            return boardId;
        }
    }

    public class InitialiseBoard
    {
        public string Name { get; set; }
    }
}
Both controller actions use the ActorProxy to retrieve the relevant instance of our Board actor service. The Post method will always create a new instance because we are using a new Guid every time.
The Get method will locate the board with the specified Guid (if it exists) or create a new one (if it doesn’t exist).
Testing the service
Now when we can make two calls, one to create and one to retrieve our board.
For Example
POST /api/board/ HTTP/1.1
Content-Type: application/json
{ name: "Jon's Board" }
Response:
"a400082f-ee10-49ca-8ee8-f9420f37b792"
Whatever GUID you get back you can use in the call to get details.
GET /api/board/a400082f-ee10-49ca-8ee8-f9420f37b792 HTTP/1.1
Response:
"Jon's Board"
Summary
Now out of preview, Service Fabric represents a promising option for building your next Microservices based application.
State persistence and replication are handled for you, freeing you up to focus on your application’s business logic.
Now all that’s left is for you to continue this journey and build the next Trello!